
If you’ve ever cut a piece of wood, plastic, or metal and ended up with a fuzzy, splintered, or jagged edge instead of a clean line, you’re not doing anything wrong.
This is one of the most common frustrations in cutting work, whether you’re a weekend DIYer building a shelf or someone running a workshop full of power tools. The good news is that rough edges almost always come down to a handful of predictable causes, and once you know what they are, fixing them is usually pretty simple.
The Short Answer
A saw leaves rough edges mainly because of tear-out, blade quality, cutting speed, and how the material itself behaves under stress. Every cutting tool removes material by tearing or shearing through fibers, grains, or molecular bonds, and that process is rarely perfectly clean. The roughness you see is basically evidence of how the material resisted being cut.
Let’s break that down properly, because there isn’t just one villain here. Several things are usually working against you at once.
1. The Blade Itself Is Often the Problem
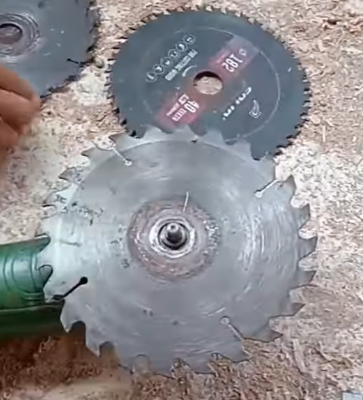
A dull or low-quality blade is probably the single biggest reason people get rough cuts. Blades wear down with use, and as the teeth lose their sharp edge, they stop slicing cleanly through material and start pushing and tearing instead.
Think of it like trying to cut a tomato with a butter knife versus a sharp chef’s knife. The dull one mashes and tears the skin rather than slicing through it. Wood, plastic, and even metal behave the same way under a worn blade.
Tooth count matters too. A blade with fewer, larger teeth (common in rip-cut blades) removes material faster but leaves a coarser finish. A blade with more, finer teeth gives you a smoother edge but cuts more slowly and can overheat if you push it too hard.
Using the wrong blade for the job, like a framing blade on delicate trim work, is a quick way to end up disappointed with the result.
2. Tear-Out and Grain Direction
This one trips up a lot of people working with wood specifically. Wood is made of long fibers, and when a saw blade exits the material, especially on the underside or the back edge of a cut, it can rip those fibers apart instead of cutting through them cleanly.
This is called tear-out, and it’s especially bad when you’re cutting against the grain or working with plywood, where the thin veneer layer chips and splinters easily.
The same basic idea applies to other materials too. Plastics can melt and re-fuse instead of cutting cleanly if the blade moves too slowly or generates too much friction. Metal can leave burrs, those annoying little raised edges, when the material is pushed and folded rather than sheared.
3. Feed Rate and Speed Mismatch
Pushing material through a saw too fast forces the blade to tear through rather than cut through, since the teeth don’t have enough time to remove material cleanly. Going too slow, on the other hand, can cause excess friction and heat, which is especially bad for plastics and some metals, leading to melted or discolored rough edges.
There’s a sweet spot for every material and blade combination, and it usually takes a bit of trial and error to find it.
4. Vibration and Instability
If your material isn’t clamped down securely, or if the saw itself isn’t stable, you’ll get micro-movements during the cut. Even tiny shifts cause the blade to wander slightly, which shows up as a rough, wavy, or chattered edge rather than a smooth one.
This is a big reason why a cheap handheld setup often gives worse results than a stationary table saw, even with the same blade. Stability really does matter more than people expect.
5. The Material’s Own Structure
Some materials are just naturally harder to cut cleanly. Particleboard, for example, is made of compressed wood chips and glue, so it tends to crumble at the edges no matter how sharp your blade is. Composite materials, certain plastics, and inconsistent-grain woods all have their own quirks that make a perfectly smooth cut harder to achieve without extra precautions like scoring cuts or backing boards.
How to Get Cleaner Cuts
A few practical fixes tend to solve most rough-edge problems:
- Use a sharp, appropriate blade for the material and the type of cut you’re making
- Slow down your feed rate, especially near the end of a cut
- Clamp your material firmly to reduce vibration
- Use a backer board or painter’s tape on the cut line to reduce splintering on plywood and veneers
- Score the cut line first with a utility knife on delicate veneer or laminate
- Let the blade do the work rather than forcing the material through
None of these require expensive equipment. Most of the improvement comes from technique and blade choice rather than buying a fancier saw.
FAQs
Why does my circular saw leave splinters on plywood?
Plywood has a thin veneer layer on top that splinters easily because the saw blade tears the fibers as it exits the cut. Using a fine-tooth blade, scoring the line first, or applying painter’s tape along the cut can drastically reduce splintering.
Does a more expensive blade actually make a difference?
Yes, generally. Higher-quality blades hold their sharpness longer and are often made with better tooth geometry, which means cleaner cuts for longer before you need to replace or sharpen them. That said, even a cheap blade cuts cleanly when it’s brand new and sharp.
Why does my saw leave burn marks on wood?
Burn marks usually happen when the blade is dull, moving too slowly, or the material isn’t feeding through smoothly, causing friction and heat buildup. Speeding up your feed rate slightly or switching to a sharper blade usually solves this.
Is rough edges normal when cutting metal?
Some roughness, called burring, is common with metal cutting and is usually removed afterward with a file or deburring tool. Excessive burring, though, often points to the wrong blade type or feed speed for that particular metal.
Can sanding fix a rough saw cut?
In most cases, yes. Sanding works well for wood and some plastics, though it won’t fully fix major tear-out or chipped veneer; those usually need filler or a different cutting approach next time.

I’m Alex, the voice behind Saw Mentor. With years of real, hands-on experience in the tools industry, I’ve learned one thing: the right tool makes all the difference.
At Saw Mentor, I share straightforward advice, honest reviews, and practical insights to help you make smarter decisions without the guesswork.