
There’s something satisfying about cutting wood with your own two hands instead of flipping a switch and letting a motor do the work. A hand saw is one of those tools that looks simple but trips up a lot of beginners, mostly because nobody ever shows them the basics.
You buy the saw, grab a piece of wood, and… the cut comes out crooked, the blade keeps jumping out of the groove, and your arm is tired after three strokes. Sound familiar?
The good news is that hand saws aren’t complicated once you understand a few fundamentals. Let’s walk through what you actually need to know.
Picking the Right Saw for the Job
Not all hand saws do the same thing, and using the wrong one is probably the number one reason beginners struggle. A crosscut saw is built for cutting across the grain of the wood, which is what most people need for general carpentry and DIY projects.
A rip saw cuts along the grain and has fewer, larger teeth. Then you’ve got specialty saws like the coping saw for curves and detail work, or the hacksaw for metal.
If you’re just starting out and want one saw that handles most jobs around the house, a basic crosscut hand saw is your best bet. Look for one with 8 to 12 teeth per inch (TPI) that’s a good middle ground between speed and a clean finish.
Get Your Wood Secured First
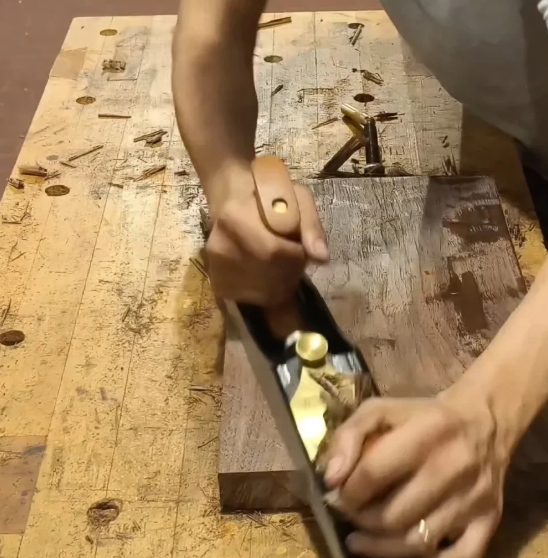
This is the step everyone skips, and everyone regrets. Wood that wiggles while you’re cutting will ruin your line and increase your odds of slipping. Use a clamp, a vise, or a pair of sawhorses to lock the piece down before you make a single stroke.
If you don’t own clamps yet, even pressing the wood firmly against a stable edge with your knee or body weight works better than nothing, though clamps are worth the investment.
Mark Your Cut Line Clearly
Don’t eyeball it. Take a pencil and a square (or even just a straight ruler) and draw a clean, visible line where you want to cut. Beginners often think they can “just cut close enough,” but a hand saw will follow whatever guidance you give it, including bad guidance. A clear line gives your eyes something to track and keeps the cut honest.
The Grip and the Stance
Hold the saw handle the way you’d shake someone’s hand, firm but not white-knuckled. Your index finger can rest along the side, pointing toward the blade for extra control. Stand with your body angled slightly to the side of the cut line, not directly behind it, so your arm can move freely without your torso getting in the way.
Your shoulder, not your wrist, should be doing most of the work. A lot of beginners try to saw with just their forearm and wrist, which tires you out fast and makes the cuts wobbly. Let the motion come from your shoulder and upper arm, with the saw moving in a straight, smooth line.
Starting the Cut
This is where most beginners get frustrated. To start a cut cleanly, place your thumb knuckle against the blade as a guide (carefully) and draw the saw backward first, not forward. A light backward stroke creates a small notch that gives the teeth something to grip.
Trying to push forward into the wood on your first stroke often causes the blade to skip or jump off the line.
Once you’ve got that starting notch, settle into a rhythm. Long, even strokes work better than short, frantic ones. Let the saw do the cutting on both the push and pull. If it’s a standard saw, don’t force it through the wood with muscle.
If you’re sawing and breathing hard like you just ran a sprint, you’re using too much arm strength and not enough technique.
Keep the Angle Consistent
The angle you hold the saw at matters more than people expect. For crosscutting, somewhere around 45 degrees relative to the wood surface is a solid starting point. Too flat and you’ll struggle to bite into the wood; too steep and you risk losing control of the line. Watch your cut line, not just the saw, and make small corrections early rather than trying to fix a crooked cut halfway through.
Let the Saw Finish the Job
As you get close to the end of the cut, ease up on your pressure a bit. Wood tends to splinter or break off right at the end if you’re still pushing hard, especially on thinner pieces. Support the offcut piece with your free hand (away from the blade, obviously) so it doesn’t snap off and tear the wood grain.
A Few Things That Trip Up Beginners
Rushing is probably the biggest mistake. Hand saws reward patience, not speed. Pressing down too hard is another common one. A sharp saw with the right tooth count needs guidance, not force. And skipping the marking step almost always leads to a crooked cut that needs cleanup work later.
Take care of your saw too. Wipe the blade down after use, especially if you were cutting treated or wet wood, and store it somewhere it won’t get knocked around or rust.
Practice Makes It Click
Like most hand tools, hand saws make sense after a bit of hands-on time. Grab some scrap wood, mark a few lines, and just practice the rhythm of starting a cut and keeping it straight. Within a handful of tries, most people start to feel the saw “wanting” to follow the line instead of fighting it.
FAQs
What’s the difference between a crosscut saw and a rip saw?
A crosscut saw is designed to cut across the wood grain and is what most beginners should start with for general projects. A rip saw cuts along the grain and has larger, more aggressive teeth, making it better suited for cutting boards lengthwise.
How many teeth per inch (TPI) should a beginner look for?
Somewhere between 8 and 12 TPI is a good all-purpose range. Fewer teeth cut faster but more roughly, while more teeth give a cleaner, slower cut. Beginners usually do well starting in the middle of that range.
Why does my saw keep jumping off the line when I start cutting?
This usually happens when you try to push the saw forward right away instead of starting with a light backward stroke to create a notch. That initial notch gives the teeth something to grip before you begin full strokes.
Do I need to clamp the wood every time I cut?
It’s strongly recommended, especially as a beginner. Wood that moves during a cut leads to crooked lines and increases the risk of the blade slipping, which isn’t something you want near your fingers.
How do I keep my hand saw working well over time?
Wipe the blade clean after each use, keep it dry to avoid rust, and store it somewhere it won’t bang against other tools. If cuts start feeling like more effort than they should, the blade may need sharpening or replacing.

I’m Alex, the voice behind Saw Mentor. With years of real, hands-on experience in the tools industry, I’ve learned one thing: the right tool makes all the difference.
At Saw Mentor, I share straightforward advice, honest reviews, and practical insights to help you make smarter decisions without the guesswork.