

If you have ever priced out custom kitchen cabinets, you already know why so many homeowners turn to DIY kitchen cabinets instead. Building your own cabinets is not as intimidating as it sounds, and with a bit of patience, basic tools, and some careful planning, you can end up with a kitchen that looks like it came out of a showroom, at a fraction of the cost.
I remember the first time I decided to build cabinets for my own kitchen. I was tired of quotes that ran into thousands of dollars for what was essentially plywood boxes with doors.
So I did some research, watched a few videos, made some mistakes along the way, and ended up with a set of cabinets that I am still proud of years later. This guide walks you through the same process, minus the mistakes I made, building on how to build your own dIY kitchen Cabinets.
Start With a Plan, Not Wood
Before you touch a saw, measure your kitchen space thoroughly. Note the width, depth, and height available for both base cabinets and upper cabinets. Standard base cabinets are usually around 24 inches deep and 34.5 inches tall, while upper cabinets tend to be about 12 inches deep.
These numbers are not set in stone, but they are a good starting point if you want your kitchen to feel familiar and functional. Sketch out your layout on paper or use free design software. Think about your workflow too. Where does the sink go? Where is the stove? Cabinets should support how you actually cook, not just fill space.
Choose Your Materials
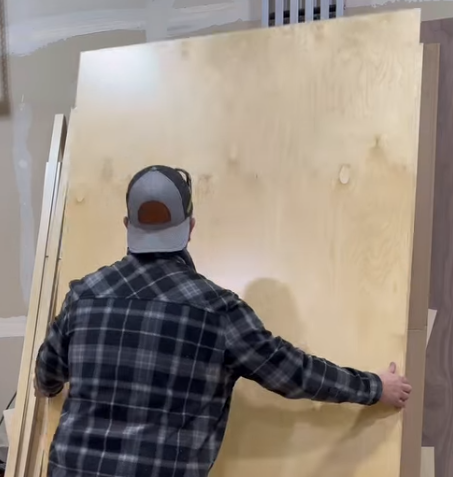
Plywood is the most common choice for cabinet boxes because it holds screws well and does not warp easily. Three quarter inch plywood is a solid choice for the box structure, while half inch works fine for shelves.
For doors and face frames, you can use solid wood like maple, oak, or poplar depending on your budget and the look you want. Do not skimp on the plywood grade. Cheaper grades often have voids inside that weaken joints and make for a frustrating build. A slightly higher grade will save you headaches later.
Build the Cabinet Boxes
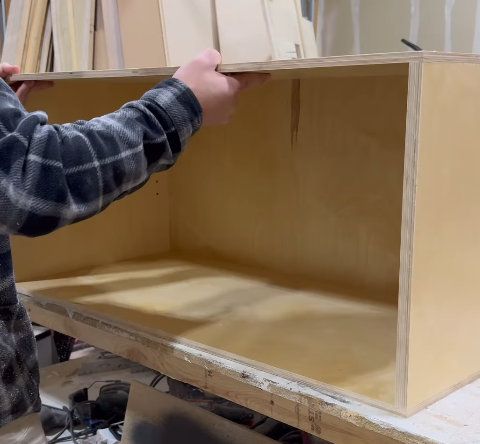
Cabinet boxes are essentially rectangular structures made of a bottom, two sides, a back, and sometimes a top depending on the design. Cut your plywood pieces according to your measurements, then assemble them using wood glue and screws or pocket hole joinery.
Pocket holes are especially popular among first time builders because they create strong joints without needing fancy tools. Make sure everything is square as you go. A cabinet that is even slightly off will cause problems when you try to install doors or align it with neighboring units. A speed square and a tape measure are your best friends here.
Add Face Frames or Go Frameless
You have two main styles to choose from. Framed cabinets have a wooden frame attached to the front of the box, giving a traditional look and adding rigidity. Frameless cabinets, sometimes called European style, skip the frame and rely on thicker box materials and edge banding for a cleaner, more modern appearance.
Framed cabinets are generally easier for beginners since the frame hides small imperfections in the box construction. Frameless cabinets require more precision but offer a slightly more contemporary aesthetic.
Install Doors, Drawers, and Hardware
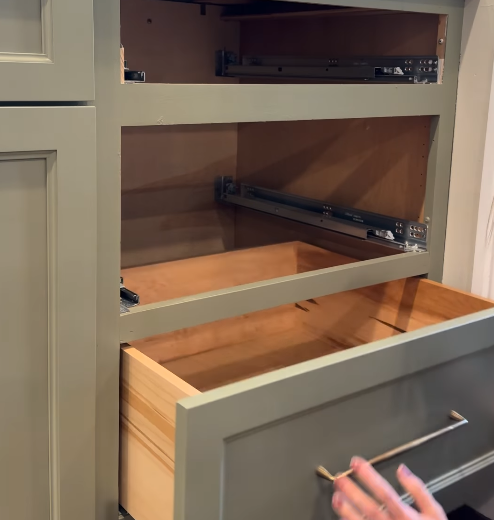
Once your boxes are built, it is time for doors and drawers. You can build your own slab or shaker style doors, or buy premade doors if you want a faster process. Drawer boxes can be built using simple butt joints or dovetail joints for extra durability.
Hinges matter more than people expect. Soft close hinges are worth the small extra cost since they prevent slamming and add a nicer feel to daily use. When it comes to drawer slides, full extension slides make it much easier to access items at the back.
Finishing Touches
Sand everything thoroughly before applying paint or stain. This step is tedious, but it makes a real difference in the final look. Primer helps paint adhere better and last longer, especially in a kitchen where cabinets face moisture and grease regularly.
Once painted or stained, seal your cabinets with a durable topcoat. Kitchens see a lot of wear, so a tough finish will keep your hard work looking good for years.
Install the Cabinets
Installing cabinets is where a level and a stud finder become essential. Base cabinets typically go in first, followed by upper cabinets. Use shims to account for uneven floors or walls, and always secure cabinets into wall studs rather than just drywall. Take your time with this part. Rushing installation can lead to gaps, unevenness, or doors that do not close properly.
Frequently Asked Questions
Is it cheaper to build my own kitchen cabinets than buying them?
In most cases, yes. Building your own cabinets often costs significantly less than custom cabinetry, and even less than semi custom options, especially if you already own basic tools. The main investment is your time.
What tools do I need to build kitchen cabinets?
A table saw or circular saw, a drill or driver, a pocket hole jig, clamps, a level, and a tape measure will cover most of what you need. A router can help if you plan to add decorative edges or trim.
How long does it take to build a full set of kitchen cabinets?
For a small to medium kitchen, expect anywhere from two to four weekends depending on your experience level and how many cabinets you are building. Painting and finishing often take longer than the actual construction.
Can I build kitchen cabinets without a table saw?
Yes, though it takes a bit more effort. A circular saw with a straight edge guide can produce clean cuts, and many hardware stores will cut plywood sheets to size for you if you provide measurements.
Do DIY cabinets hold up as well as store bought ones?
They can, as long as you use good materials and solid joinery techniques. Plywood boxes with proper glue and screws, paired with quality hinges and slides, often outlast budget store bought cabinets.
Thanks for taking the time to read this guide! We hope it helped answer your questions. If there is anything you would like to add or ask, feel free to leave a comment below. You can also explore more helpful articles on our website.

I’m Alex, the voice behind Saw Mentor. With years of real, hands-on experience in the tools industry, I’ve learned one thing: the right tool makes all the difference.
At Saw Mentor, I share straightforward advice, honest reviews, and practical insights to help you make smarter decisions without the guesswork.
1 thought on “How to Build Your Own DIY Kitchen Cabinets”