

If you have ever assumed you needed a table saw and a garage full of expensive equipment to build cabinets, I am here to tell you that is not the case. I have built several sets of cabinets using nothing more than a circular saw, a straightedge guide, and a bit of patience, and the results held up just as well as anything from a big box store.
The truth is that a sharp blade, a steady hand, and a good plan will get you further than most people expect. This guide walks through the whole process, from picking materials to hanging the finished boxes on the wall, using a tool that most homeowners already have sitting in the garage.
Why a Circular Saw Works Just Fine
People get intimidated by cabinet building because they picture a woodworking shop with a cabinet saw, a jointer, and a planer. None of that is required for basic box style cabinets. A circular saw paired with a quality guide rail or a homemade straightedge can produce cuts that are every bit as clean as a table saw, especially on sheet goods like plywood and MDF.
The saw is portable too, which matters a lot if you are building in a garage or a spare room rather than a dedicated shop. You can break down full sheets of plywood right where they sit instead of wrestling them onto a table saw by yourself.
The key is control. A circular saw wanders when it is unsupported, so the guide does the heavy lifting. Once you get comfortable running the saw against a fence, your cuts become repeatable and accurate enough for face frame or frameless cabinet construction.
How to Build Cabinets with a Circular Saw? Tools and Materials You Will Actually Need
You do not need a huge shop for this project, but a few things make the work much easier and safer.
Tools
- A circular saw with a sharp blade rated for plywood (a 40 tooth blade gives a cleaner edge than a standard framing blade)
- A straightedge guide or track saw style rail
- A drill or impact driver with countersink bits
- A speed square and a tape measure
- Clamps, at least four
- A pocket hole jig if you plan to join panels without visible screws
- Sandpaper or an orbital sander
Materials
- Plywood or MDF sheets (3/4 inch for boxes, 1/4 inch for backs)
- Edge banding if you want a finished look on plywood edges
- Wood glue
- Cabinet screws or pocket screws
- Hinges, drawer slides, and pulls
- Wood filler and finish of your choice
Step 1: Plan Your Cabinet Dimensions
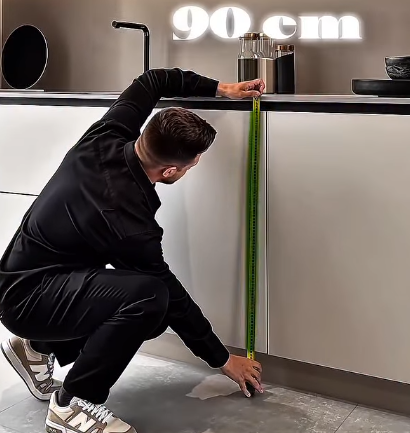
Before any cutting happens, sketch out your cabinets and write down exact measurements. Standard base cabinets sit around 34.5 inches tall and 24 inches deep, while upper cabinets are usually 12 to 24 inches deep depending on the space. Measure your actual wall, account for appliances, and leave a little wiggle room since walls are rarely perfectly square.
It helps to draw a simple cut list on paper listing every piece you need: sides, top, bottom, back, shelves, and doors. This keeps you from wasting plywood and gives you something to check off as you work.
Step 2: Break Down Your Plywood Sheets
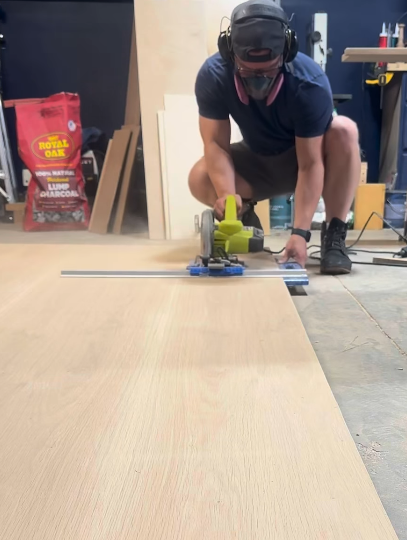
This is where the circular saw earns its keep. Lay your plywood sheet on a couple of foam insulation boards or sawhorses so the blade has room to pass through without hitting the ground.
Clamp your straightedge guide at the measurement you need, double check it with a tape measure on both ends, and make your cut in one smooth pass. Do not stop halfway through a cut since that is when the blade tends to wander or bind.
Cut your largest pieces first (the sides, top, and bottom) and work down to smaller pieces like shelves and face frame parts. This is standard practice in any shop because it reduces waste and gives you flexibility if a piece comes out slightly short.
Step 3: Assemble the Cabinet Box
Once your panels are cut, dry fit everything before adding glue. Lay the sides, top, and bottom together and check that everything is square using your speed square in each corner. A cabinet that is out of square will cause doors and drawers to fit poorly later, so this step is worth the extra few minutes.
Apply wood glue to the joints, then drive pocket screws or cabinet screws through the sides into the top and bottom. Clamp while the glue sets. Attach the thin plywood back panel last, since it helps square up the whole box and adds rigidity.
Step 4: Add Face Frames or Edge Banding
If you are building face frame cabinets, cut your frame pieces from solid wood using the same circular saw and guide method, then glue and pin nail them to the front of the box.
For a frameless or European style look, apply edge banding to any exposed plywood edges with an iron, then trim the excess with a utility knife.
Step 5: Install Doors, Shelves, and Hardware
Cut your shelf pieces to fit and install shelf pins or supports at your desired heights. For doors, measure the opening carefully, cut your door panels, and attach hinges according to whatever style you chose, whether that is standard overlay hinges or European soft close hinges. Add drawer slides if your cabinet includes drawers, and finish up with pulls or knobs.
Step 6: Sand, Finish, and Install
Give every surface a good sanding, starting with 120 grit and moving up to 220 for a smooth finish. Apply paint, stain, or a clear coat depending on the look you want. Once everything is dry, set the cabinets in place, check for level using shims where needed, and screw them into wall studs for a secure hold.
A Few Tips That Make a Real Difference
Keep your blade sharp. A dull blade tears plywood veneer and makes it much harder to get clean lines. Also, always cut with the good side of the plywood facing down if you are using a standard circular saw, since the blade tends to chip the top face on the up cut.
Take your time squaring each box before the glue sets, because rushing this step is the number one reason home built cabinets end up crooked. And do not be afraid to make a test cut on scrap plywood before cutting your good sheets, especially if you are still getting a feel for your guide rail setup.
Frequently Asked Questions
Can a circular saw really replace a table saw for cabinet building?
For most home cabinet projects, yes. With a good straightedge guide, a circular saw can make rip cuts and cross cuts nearly as accurate as a table saw. The main difference is speed and repeatability on large production runs, but for a kitchen or a few built ins, a circular saw handles the job well.
What blade should I use for cutting plywood cleanly?
Look for a blade with a higher tooth count, around 40 to 60 teeth, designed for fine or plywood cuts. These blades leave a much smoother edge and reduce chipping compared to a standard 24 tooth framing blade.
How do I keep my cuts straight without a track saw?
A simple straightedge clamped to the sheet works fine. Measure from the edge of your saw base to the blade, then offset your clamped guide by that same distance so the blade lines up exactly where you want to cut.
Do I need special screws for cabinet assembly?
Cabinet screws or pocket hole screws work well since they are designed to grip plywood layers without splitting them. Regular drywall screws are not ideal since they can snap under stress over time.
How long does it take to build a full set of kitchen cabinets this way?
It depends on the size of the kitchen and your experience level, but most DIYers can expect somewhere between two and four weekends for a full set, including cutting, assembly, finishing, and installation.
Thanks for taking the time to read this guide! We hope it helped answer your questions. If there is anything you would like to add or ask, feel free to leave a comment below. You can also explore more helpful articles on our website.

I’m Alex, the voice behind Saw Mentor. With years of real, hands-on experience in the tools industry, I’ve learned one thing: the right tool makes all the difference.
At Saw Mentor, I share straightforward advice, honest reviews, and practical insights to help you make smarter decisions without the guesswork.