

If you have ever pulled a fresh cut off the saw and found the top layer of veneer torn to shreds, you already know why so many people search for how to cut plywood without chipping.
Plywood is basically thin sheets of wood glued together, and that top veneer layer is thin enough that almost any blade will tear it apart if you are not careful.
The good news is that chipping is not really a mystery once you understand why it happens, and fixing it usually comes down to blade choice, prep work, and a bit of patience.
Why Plywood Chips in the First Place
Plywood chips because the saw blade is lifting and tearing the wood fibers on the top surface as it exits the cut, rather than slicing cleanly through them. A standard wood blade with fewer, larger teeth is built for speed, not finesse, so it rips through plywood veneer instead of shearing it.
The direction the blade spins also matters. On a circular saw or table saw, the blade cuts upward through the material on the underside, but the teeth are exiting through the top on the way up, and that upward motion is what tears the grain along the top face.
Pick the Right Blade
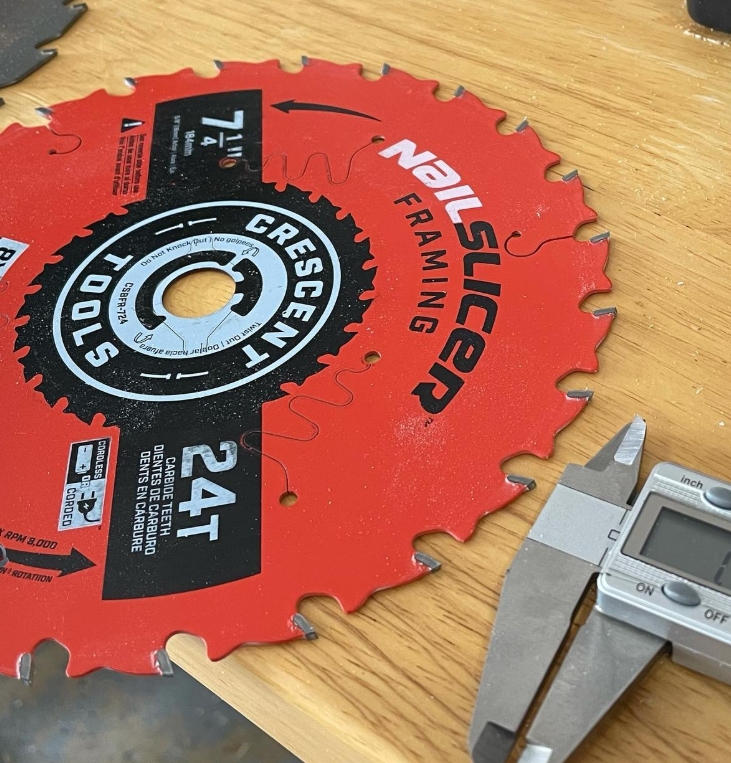
This is the single biggest factor. A blade with a high tooth count, somewhere around 60 to 80 teeth for a 7 1/4 inch circular saw blade, will give you a much cleaner cut than a standard 24-tooth framing blade.
Look for something labeled as a plywood or finish blade. These blades have smaller teeth set closer together, which means less material is being ripped out at once. If you do a lot of plywood work, it is worth keeping a dedicated fine tooth blade just for this purpose instead of switching back and forth.
Score the Cut Line First
Before you make the actual cut, run a sharp utility knife or a marking knife along your cut line, pressing just deep enough to slice through the top veneer. This breaks the wood fibers ahead of the blade so they cannot tear and pull upward when the saw passes through.
Some woodworkers use a straightedge clamped down as a guide for this step so the score line stays perfectly straight. It only takes a minute or two, but it makes a noticeable difference on cabinet grade plywood where the finish really matters.
Tape the Line
Painter tape or masking tape applied directly over the cut line does something similar to scoring. The tape holds the surface fibers together as the blade passes through, which reduces tearout on both sides of the cut.
This trick works especially well on melamine and other veneered sheets that chip easily. Apply the tape, mark your line right on top of it, cut through the tape and the plywood together, then peel it away once you are done.
Set the Blade Depth Correctly
A lot of people run their circular saw blade too deep, extending it several inches below the material. Set the blade so it only extends about a quarter inch past the bottom of the plywood.
A shallower cut means fewer teeth are engaged in the wood at any given moment, which lowers the chance of tearout and also makes the saw easier to control.
Cut With the Good Side Facing the Right Way
Remember that circular saws and table saws cut upward, so the top face of the board is more likely to chip. If you are using a circular saw, place the good side of the plywood facing down.
If you are using a table saw, place the good side facing up, since the blade enters from below on that setup. Jigsaws behave the opposite of circular saws in many cases depending on the blade, so check which way your specific blade cuts before you commit to a full sheet.
Slow Down and Let the Blade Do the Work
Pushing a saw too fast through plywood is one of the most common causes of chipped edges. Feed the material or the saw at a steady, moderate pace and let the teeth cut rather than forcing them through. Rushing the cut is often the difference between a clean edge and a torn one, even with the right blade installed.
Support the Sheet Properly
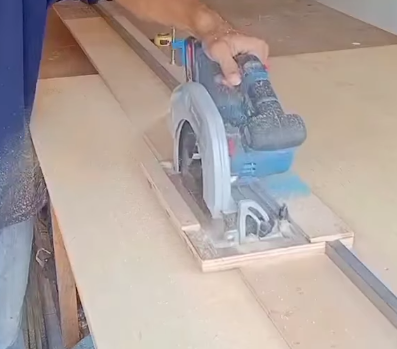
Plywood that is not fully supported will flex during the cut, and that flexing puts extra stress on the veneer right where the blade is cutting. Lay the sheet flat across sawhorses or a foam board setup so the area around your cut line is well supported on both sides.
Some sheet goods setups use rigid foam insulation boards underneath as a sacrificial surface, which also lets you cut all the way through without worrying about the blade hitting a hard surface below.
Clean Up the Edge Afterward
Even with all these precautions, you might get a small amount of chipping here and there. A light pass with fine grit sandpaper along the edge can smooth out minor tearout. For anything more noticeable, a sharp block plane can shave down small splinters without removing much material.
FAQs
Does the type of plywood affect how much it chips?
Yes. Cabinet grade and hardwood veneer plywood tend to chip more easily than construction grade plywood because the veneer layer is thinner and more delicate. Softer veneers like birch or maple can tear out more than harder ones.
Can I use a jigsaw instead of a circular saw?
You can, but jigsaws are more prone to chipping on curved or detailed cuts unless you use a fine tooth, downward cutting blade. For straight cuts, a circular saw or table saw with the right blade usually gives cleaner results.
Is scoring really necessary if I already have a good blade?
It is not always necessary, but it adds an extra layer of protection, especially on expensive veneered plywood where you cannot afford mistakes. Many professionals score as a habit even with a quality blade installed.
Why does my table saw chip the bottom of the plywood instead of the top?
Table saws cut from underneath, so the blade exits through the bottom of the sheet. This means any tearout usually shows up on the underside rather than the top face.
Will a new blade fix all my chipping problems?
A sharp, fine tooth blade solves most of the problem, but combining it with scoring, taping, proper support, and a slow, steady feed rate gives the cleanest results overall. Relying on the blade alone still leaves room for error.
Thanks for taking the time to read this guide! We hope it helped answer your questions. If there is anything you would like to add or ask, feel free to leave a comment below. You can also explore more helpful articles on our website.

I’m Alex, the voice behind Saw Mentor. With years of real, hands-on experience in the tools industry, I’ve learned one thing: the right tool makes all the difference.
At Saw Mentor, I share straightforward advice, honest reviews, and practical insights to help you make smarter decisions without the guesswork.