

If you have ever tried to fix something on your kitchen table and ended up with a scratch, a dent, and an angry spouse, you already know why a DIY workbench belongs in every garage or shed. It does not need to be fancy.
It just needs to be sturdy, the right height for you, and big enough to hold whatever project you throw at it. In this guide, I will walk you through a simple diy workbench plans build that almost anyone can put together in a weekend, even if your woodworking experience starts and ends with putting together flat pack furniture.
Why Build Your Own Instead of Buying One
Store bought benches are often flimsy, oddly sized, or priced way higher than they should be for what amounts to a table with a shelf. When you build your own, you decide the height, the length, the storage, and the surface material.
You also end up with something that actually fits your space instead of forcing your space to fit a bench that was designed for a generic garage in a catalog photo. And honestly, there is a certain satisfaction in using a workbench that you built with your own hands before you ever put a single tool on it.
What You Will Need
You do not need a warehouse full of tools for this project. Most simple workbench plans call for:
- 2×4 lumber for the frame and legs (the exact count depends on your dimensions, but plan for around twelve to sixteen boards for a standard 6 foot bench)
- 3/4 inch plywood for the top, and a second sheet if you want a lower shelf
- Wood screws, roughly 3 inches for framing and shorter ones for attaching the top
- A saw (circular saw or miter saw works fine)
- A drill and driver bits
- A speed square and tape measure
- Wood glue if you want extra rigidity
- Sandpaper and a finish of your choice if you want to protect the surface
None of this is exotic. You can grab it all from a single trip to the hardware store.
Step 1: Decide on Dimensions
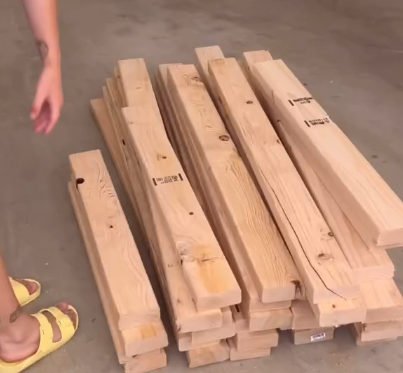
Before cutting anything, figure out how tall, wide, and deep you want the bench. A height between 34 and 36 inches works for most people, but the real test is standing next to a table of that height with your arms relaxed.
If your palms rest flat without hunching or reaching, that is your number. For length, 6 feet is a common sweet spot, and 24 inches deep gives you enough surface without eating up the whole garage.
Step 2: Build the Frame
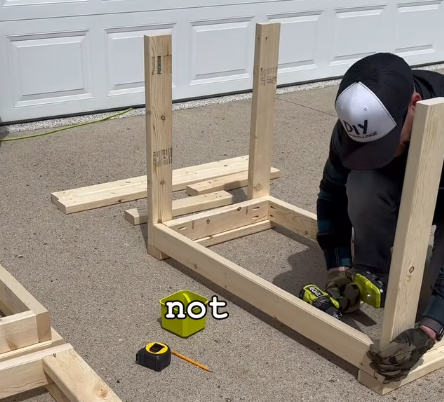
Cut your legs first, then the horizontal rails that connect them. A simple box frame with cross supports is plenty strong for most home use. Screw the rails to the legs using an L bracket or pocket screws, and add diagonal braces if you plan on using the bench for heavy work like hammering or clamping.
This is also the point where a speed square earns its keep, since keeping everything at true right angles now saves you a wobbly bench later.
Step 3: Attach the Top
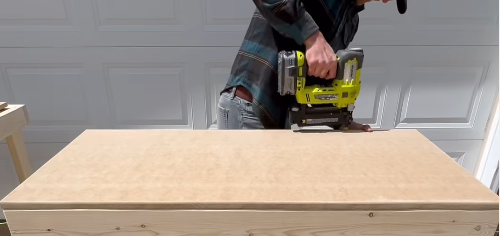
Lay your plywood on top of the frame and check that it overhangs evenly on all sides, then screw it down from underneath if possible so the top stays clean.
If you want a tougher surface, you can double up the plywood or add a layer of hardboard on top that you can replace later once it gets chewed up from years of cutting and hammering.
Step 4: Add a Lower Shelf
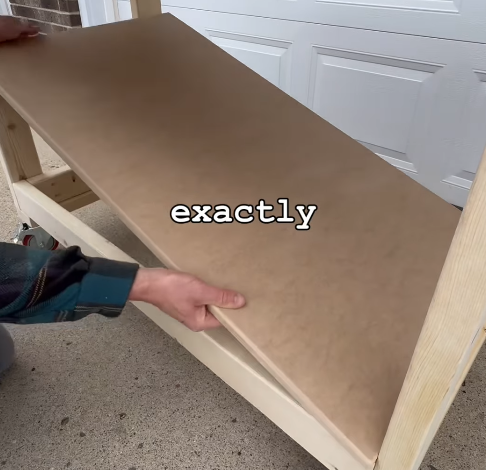
A shelf near the bottom of the legs does two things at once. It gives you a spot to store tools and supplies, and it stiffens the whole structure so the legs cannot splay out under load. Just cut a piece of plywood to fit inside the leg frame and screw it onto cleats attached to the inside of the legs.
Step 5: Sand and Finish
Once the structure is solid, go over any rough edges with sandpaper so you are not picking up splinters every time you lean on the bench. A coat of polyurethane or even just some leftover paint on the legs will help the wood last longer, especially if the bench lives in a garage that gets damp in winter.
A Few Tips From Experience
Do not skip the diagonal bracing if you plan to do any real pounding or clamping on the bench, because a wobbly workbench is almost worse than no workbench at all. Also, resist the urge to make it too small just to save on materials.
People almost always wish their bench was a bit bigger once they start actually using it. Finally, if you think you might move it someday, consider adding locking casters to the bottom instead of fixed feet.
Final Thoughts
A DIY workbench does not have to be complicated to be useful. With a handful of 2x4s, a sheet of plywood, and an afternoon or two, you can build something that will outlast most store bought options and actually suit the way you work. Once it is done, you will probably wonder why you put up with that kitchen table for so long.
FAQs
How much does it cost to build a simple DIY workbench?
Most basic builds run somewhere between 80 and 150 dollars depending on lumber prices in your area and whether you add extras like a shelf or casters.
What is the best height for a workbench?
Somewhere between 34 and 36 inches suits most people, but the real answer depends on your own height and whether you will be doing standing work or seated work at the bench.
Do I need power tools to build a workbench?
A drill and a saw make things much faster, but a hand saw and a screwdriver can get the job done too if you are patient and do not mind a bit more elbow grease.
Can I build a workbench without plywood?
Yes, some people use solid wood planks for the top instead, which can look nicer but usually costs more and takes a bit more work to keep flat over time.
How do I keep my workbench from wobbling?
Add diagonal braces between the legs and rails, make sure your frame is square before attaching the top, and check that all your legs sit flat on the floor.
Thanks for taking the time to read this guide! We hope it helped answer your questions. If there is anything you would like to add or ask, feel free to leave a comment below. You can also explore more helpful articles on our website.

I’m Alex, the voice behind Saw Mentor. With years of real, hands-on experience in the tools industry, I’ve learned one thing: the right tool makes all the difference.
At Saw Mentor, I share straightforward advice, honest reviews, and practical insights to help you make smarter decisions without the guesswork.
1 thought on “DIY Workbench Plans: How to Build a Simple Workbench”