
There’s nothing more frustrating than cutting a beautiful piece of hardwood, flipping it over, and finding a ragged, splintered edge where you expected a clean line. Tear out. Every woodworker has been there, and most have quietly sworn at a workbench because of it.
The good news is that tear out isn’t bad luck. It’s physics. And once you understand what’s actually happening, you can stop it almost entirely.
What’s Actually Causing It
Before you fix a problem, you need to understand it. Tear out happens when wood fibers get ripped away from the surface instead of being sliced cleanly. As your saw blade exits the cut, the teeth are moving upward on one face of the board, and if those fibers aren’t supported, they pull apart rather than shear off.
This is why tear out almost always shows up on the exit side of the cut. On a table saw, that’s typically the top face. On a circular saw, it’s usually the bottom. On a jigsaw, the top again. Once you know which face is at risk, you can take steps to protect it.
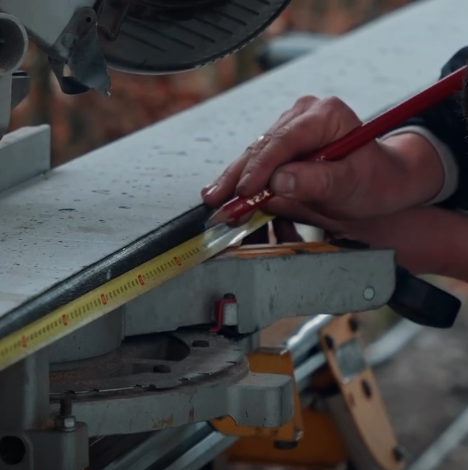
Score the Cut Line First
This is the single most effective thing you can do, and a lot of hobbyists skip it.
Take a sharp marking knife or a utility knife and score along your cut line before you ever pick up a saw. Press firmly; you want to sever those surface fibers, not just scratch them. When the blade comes through, those fibers are already cut. There’s nothing left to tear.
It takes maybe 30 seconds. The results are genuinely dramatic, especially on veneered plywood and figured hardwoods that love to splinter.
Use Masking Tape
A trick borrowed from cabinet shops: apply a strip of blue painter’s tape directly over your cut line on the vulnerable face of the board. Mark your line on top of the tape, make the cut, then peel it away.
The tape holds the wood fibers down as the blade passes through. It’s not as foolproof as scoring, but for quick jobs it works surprisingly well, and it’s fast.
Some people do both. Score first, then tape. Overkill on most cuts, but for irreplaceable pieces, it’s worth the extra minute.
Check Your Blade (Seriously)
A dull blade is the number one reason cuts go wrong. A sharp blade slices; a dull blade tears. If you’ve been running the same blade for a year without sharpening or replacing it, that’s probably contributing to your problem more than anything else.
For clean crosscuts on hardwood, you want a blade with more teeth. A 60 or 80 tooth crosscut blade on a table saw, or miter saw, will leave a much cleaner edge than a 24 tooth ripping blade. The more teeth, the smaller each individual chip, and the less opportunity for fiber pullout.
For circular saws, make sure the blade is installed correctly. It sounds obvious, but it happens: a blade installed backwards will cut, but will tear terribly.
Mind Your Feed Direction
On a table saw, always feed the workpiece so the good face is down. The blade exits through the top, so the top surface gets the worst of it. Keep your show face against the table.
On a circular saw, it’s the opposite, the blade enters from the top and exits through the bottom, so keep your good face up and cut from the back side.
With a miter saw or chop saw, the blade comes down and exits through the bottom, so again, good face up.
It’s worth thinking through which face is your show face before every cut. Takes two seconds and saves a lot of grief.
Slow Down at the End of the Cut
A lot of tear out happens in the final inch. The wood loses support as the cut completes, and if you’re pushing through quickly, those last fibers have nothing to hold them.
On through-cuts with a hand saw or jigsaw, slow your stroke as you approach the end. Support the offcut with your free hand so it doesn’t drop away and splinter the edge.
On a table saw, this isn’t as much of an issue since the workpiece stays supported, but on freehand cuts, it makes a real difference.
Use a Backer Board
If you’re cutting with a router or a drill press or even a jigsaw, clamp a piece of scrap wood against the back of your workpiece. The backer board supports the fibers right at the exit point, and there’s nowhere for them to go except cleanly through.
This is standard practice for drilling holes in plywood, and it works just as well for saw cuts. Use a piece of MDF or flat scrap, clamp it tight, and cut through both together.
Grain Direction Matters
With hand tools especially, always try to cut with the grain rather than against it. When you’re planing or chiseling, this is critical. With saws, it’s less pronounced but still relevant; cutting against the grain on figured or interlocked wood is always going to be riskier.
When you can choose your cut direction, choose the one where the grain runs into the surface you’re cutting toward rather than away from it.
A Note on Plywood
Plywood is particularly prone to tear out because the face veneer is thin and the glue layers can telegraph chips. A few things help specifically with sheet goods:
- Use a fine-tooth blade (at least 40 teeth for plywood)
- Always score before cutting
- Cut veneered plywood with the good face down on a table saw, and the good face up on a circular saw
- For critical cuts, use a track saw if you have access to one. They’re designed to minimize tear out
The Bottom Line
Avoiding tear out isn’t about having expensive equipment. It’s about understanding where the problem comes from and working a few simple habits into your process. Score your lines. Keep your blades sharp. Think about which face needs protecting before you cut. Support the exit side.
Do those things consistently, and you’ll stop losing good wood to ragged edges. The difference in your finished work will be noticeable, and so will the drop in workshop frustration.

I’m Alex, the voice behind Saw Mentor. With years of real, hands-on experience in the tools industry, I’ve learned one thing: the right tool makes all the difference.
At Saw Mentor, I share straightforward advice, honest reviews, and practical insights to help you make smarter decisions without the guesswork.