

If you have ever tried to cut a straight line with a circular saw and ended up with something closer to a wandering river than a clean edge, you are not alone. Almost everyone who picks up a circular saw for the first time struggles with this.
The good news is that cutting straight isn’t about having steady hands or years of experience. It comes down to setup, the right guide, and a few habits that keep the blade tracking where you want it to go.
Why Circular Saw Cuts Go Crooked in the First Place
Before fixing the problem, it helps to understand why it happens. Most crooked cuts come from one of three things: the saw drifting because you are steering it by eye instead of following a guide, the wood pinching the blade halfway through the cut, or the base plate not being flush against the material. Once you know what causes the wander, it becomes much easier to prevent it.
Mark Your Line Clearly
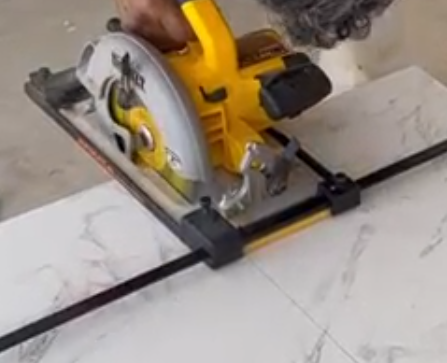
Start with a pencil and a speed square or a long straightedge. Draw a clear, visible line on the workpiece. Don’t just eyeball a mark from one end to the other. Measure from a fixed reference point at both ends of the board and connect the dots.
A faint or shaky pencil line will only tempt you to correct your path mid-cut, which is exactly what causes the blade to veer off.
Use a Guide Instead of Freehanding
This is really the secret that separates a rough DIY cut from a clean one. Professional carpenters almost never freehand a long rip cut. They clamp a straight board, a metal rail, or a dedicated saw guide to the material and run the saw’s base plate against it.
You can make your own guide out of a straight piece of plywood or MDF. Clamp it parallel to your cut line, keeping in mind the distance between the saw blade and the edge of the base plate, then run the saw along it.
If you don’t want to measure that offset every time, you can build a simple zero clearance guide once and reuse it for every project after that.
Set Up Before You Start Cutting
Check the blade depth first. It should extend about a quarter inch below the bottom of the material, no more. A blade set too deep increases friction and makes the saw harder to control. Also check that your base plate is square to the blade, since many saws drift out of alignment over time.
Support the workpiece properly too. If the board isn’t fully supported, it can sag and pinch the blade as you cut, which pulls the saw off line. Use sawhorses and position the cut so the offcut side is unsupported and free to fall away, rather than the section you actually need.
Keep a Steady Pace and Let the Saw Do the Work
Once the saw is cutting, resist the urge to force it through the material. Push at a steady, even speed and let the blade do the cutting rather than muscling it forward.
If you feel resistance or hear the motor bog down, ease off slightly rather than pushing harder. Rushing the cut is one of the most common reasons a straight line turns into a curve partway through.
Keep your eyes on the guide, not on the blade itself. Many people watch the blade to make sure it stays on the pencil line, but this actually makes overcorrection more likely. Watch the edge of the base plate against your guide instead, and trust that the line will follow.
Double Check Your Grip and Stance
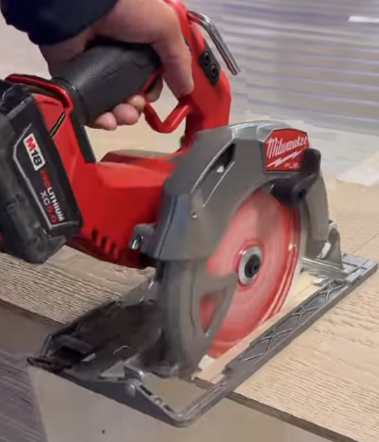
Stand in a position where you can walk the full length of the cut without twisting your body or reaching awkwardly. Keep both hands on the saw when the design allows it, one on the main handle and one on the front knob, so you have full control throughout the pass.
A Few Extra Tips Worth Remembering
Always let the blade reach full speed before it touches the wood. Starting the cut with a slow blade often causes it to grab and jump sideways. Also, replace dull blades sooner rather than later. A sharp blade cuts smoothly and tracks straight, while a dull one tends to wander and burn the wood.
With a clear line, a solid guide, proper setup, and a steady pace, cutting straight with a circular saw becomes far less intimidating. It’s a skill that improves quickly once the right habits are in place.
FAQs
Can I cut a straight line with a circular saw without a guide?
It’s possible on short cuts if you have practice, but for anything longer than a foot or two, a clamped guide will give far more consistent results than freehanding.
What is the best guide to use for a circular saw?
A straight edged board or a metal rail clamped to the workpiece works well. Track saw style guides are even more precise if you plan to make straight cuts often.
Why does my circular saw pull to one side while cutting?
This usually happens because of a dull blade, an unsquare base plate, or the wood pinching the blade due to poor support underneath the cut.
How deep should the blade be set for cutting plywood or lumber?
Set the blade so it extends roughly a quarter inch past the bottom of the material. This reduces friction and gives you better control over the cut.
Should I follow the pencil line or the saw guide while cutting?
Follow the guide. Watching the pencil line too closely often leads to small corrections that throw the cut off track, while a guide keeps the path consistent from start to finish.
Thanks for taking the time to read this guide! We hope it helped answer your questions. If there is anything you would like to add or ask, feel free to leave a comment below. You can also explore more helpful articles on our website.

I’m Alex, the voice behind Saw Mentor. With years of real, hands-on experience in the tools industry, I’ve learned one thing: the right tool makes all the difference.
At Saw Mentor, I share straightforward advice, honest reviews, and practical insights to help you make smarter decisions without the guesswork.